|
SysPrep Guide: Hardware Abstraction Layer (HAL) - [3/8] +
Overview
The hardware abstraction layer (HAL) is a kernel level driver that provides an interface between the operating system and the system architecture. There are several HALs that Windows can use and they impact available features and performance depending on which systems they are used on. You can find the list below and some comments about them. Some of the HALs allow Windows to work on very different hardware, but now that x86 is the universal architecture for Windows computers the choice for a HAL is simplified a great deal. I will go into more detail after you browse through the HALs below.
Available Hardware Abstraction Layers (HALs)
Standard PC
DLL: hal.dll
Kernel: ntoskrnl.exe
PAE:
ntkrnlpa.exe
|
This is the most primitive HAL and it supports all computers that are compatible with Windows 2000 and Windows XP. It does not support the advanced the programmable interrupt controller (APIC) architectures and does not provide APCI features including the configuration management and the advanced power management. You can use this on any computer, but at the cost of performance and features. More than likely you will never use this HAL. |
| Standard PC with C-Step i486 |
This is a primitive HAL that provides support for C-stepping on 486 processors. I am not sure what that is, but I am pretty sure it's old and I severely doubt you will ever use it. |
|
Advanced Configuration and Power Interface (ACPI) PC
DLL: halacpi.dll
Kernel: ntoskrnl.exe
PAE: ntkrnlpa.exe
|
I find that this HAL is the best selection for an image that you want to be compatible on as many computers as possible. It should be noted that multiprocessor computers can use this HAL, however they will only make use of a single processor. This HAL can also be used with hyperthreading without any problem, but it will effectively disable hyperthreading because it is only designed for a single processor system. |
ACPI Uniprocessor PC
DLL: halaacpi.dll
Kernel: ntoskrnl.exe
PAE: ntkrnlpa.exe |
This HAL is designed for single processor computers that are not compliant with the multiprocessor system specficiations. This HAL will run on computers that are fairly new systems, such as all Pentium 4 based systems. However, I have found problems with duplicating this HAL onto some older Pentium 3 based systems. You can read about the ACPI standards by reading this and you can read about the core architecture modules here. |
ACPI Multiprocessor PC
DLL: halmacpi.dll
Kernel: ntkrnlmp.exe
PAE: ntkrpamp.exe
|
This HAL is designed for multiprocessor computers that are not compliant with the multiprocessor system specficiations. It is rumored that you will receive about a 15% performance gain from using this HAL over the standard ACPI HAL when you have a hyperthreaded system, but I have not tested this yet. You can read about the ACPI standards by reading this and you can read about the core architecture modules here. |
MPS Uniprocessor PC
DLL: halapic.dll
Kernel: ntoskrnl.exe
PAE: ntkrnlpa.exe |
This HAL is designed for multiprocessor systems that have a single processor. You can read about the MPS standards by reading this. As far as I know this is only used by older Xeon based systems with a single processor. |
MPS Multiprocessor PC
DLL: halmps.dll
Kernel: ntkrnlmp.exe
PAE: ntkrpamp.exe |
This HAL is designed for multiprocessor systems that have multiple processors. You can read about the MPS standards by reading this. As far as I know this is only used by older Xeon based systems with multiple processors. |
| Compaq SystemPro Multiprocessor or 100% Compatible PC |
Designed for Compaq SystemPro multiprocessor systems. You will most likely never use this HAL. |
Choosing a HAL
If you want to make your image as compatible as possible you should use the "Advanced Configuration and Power Interface (ACPI) PC" HAL. This HAL will work on most any modern computer, but it won't take advantage of multiple processors or even hyperthreading. It also won't work at all on older Xeon based computers.
If all of your computers are modern then you could then use ACPI Multiprocessor PC to support multiple cores and hyperthreading. If your computers are no older than 3 years then you'll be fine, but but modern should cover computers until around 2003, or during the time period when hyperthreading was introduced. However, if you use a more modern HAL and apply the image to an older computer that doesn't support the HAL then at best there will be a severe performance hit but more than likely the computer will either display a blue screen with an error code on boot or reboot, depending on how you have your computer configured.
Selecting the HAL
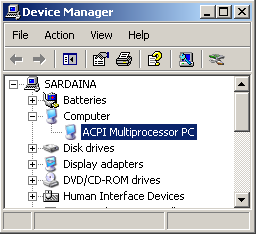 The HAL can be selected manually in the Windows Setup when installing Windows by using the F5 key during the part where you can use F6 to choose mass storage device drivers, or you can view and change your HAL from within Windows' Device Manager by changing the computer driver. You can also tell which HAL your computer is made for because it will be the default chosen HAL for that machine after a fresh Windows installation on it. That is, if you install Windows on your computer and then check device manager under the Computer section then you will see what the preferred HAL for that computer is. What this means is that Windows always, as would be hoped, selects the proper HAL for the hardware installed onto. The HAL can be selected manually in the Windows Setup when installing Windows by using the F5 key during the part where you can use F6 to choose mass storage device drivers, or you can view and change your HAL from within Windows' Device Manager by changing the computer driver. You can also tell which HAL your computer is made for because it will be the default chosen HAL for that machine after a fresh Windows installation on it. That is, if you install Windows on your computer and then check device manager under the Computer section then you will see what the preferred HAL for that computer is. What this means is that Windows always, as would be hoped, selects the proper HAL for the hardware installed onto.
I would suggest choosing it during the installation because it is much cleaner than swapping out the HAL after the fact. If you switch architectures then you will need to completely redetect the hardware since the underlying plug and play system will have changed, but if you change between similar HALs then this won't be necessary. For complete instructions on how to do that please see the video section of this guide.
For more advanced HAL selection and detection please see the next section.
Selecting Multiple HALs
If your desire is to deploy an image using SysPrep to computers with different HALs then there is no good ways to do this. However, there is one fairly standard way to do it in an automated fashion and two other manual ways that could be automated with a bit of ingenuity. The first is easy to handle and the last two are more for advanced users.
And you of course can mix the methods in different creative (useful) ways. Like, you could use method 1 to have it automatically switch between single and multi-processor ACPI systems and then use method 2 or 3 to provide extended functionality for outlier systems.
Method 1: HAL UpdateUPHAL
This way is the easiest way to handle this and it's the most standard way of doing it because it's handled within SysPrep. Just select the ACPI Uniprocessor PC as your HAL and in your sysprep.inf use UpdateHAL=ACPI APIC_MP,%windir%\inf\hal.inf option in the [Unattended] section. This means that the image will be built to accomodate single processor computers, but if the image is applied to a computer that should be using the ACPI Multiprocessor PC HAL then it will automatically switch during the mini-setup. This is most likely the most useful and easiest solution for you.
The downside is that it only allows switching between the uni and multi variations and doesn't allow different architectures. So, while you could get it to work for single and multiple processor Pentium computers, it wouldn't work on older Xeon computers. However, you could instead build the computer on a MPS Uniprocessor PC and use UpdateHAL=MPS_MP_MP,%windir%\inf\hal.inf instead, but then it won't work on non-MPS systems, which is most likely even less use to you.
Method 2 & 3: Overwrite HAL System Files / Reconfigure the boot.ini
As far as I can tell the HAL is composed of three components; the HAL dynamically linked library (hal.dll), the NT operating system kernel image executable (ntoskrnl.exe) and the NT physical address extension companion executable (ntkrnlpa.exe). The last is only needed if the operating system uses PAE to access up to 64GB of memory, but it should always be included just in case and since all modern computers require it.
The various different HALs are included on the Windows installation CD, but they are compressed and renamed. If you look at the table above for the available hardware abstraction layers you will see the name of the HAL files. They will be stored on the Windows installation disk in the i386 directory. They will be named the same except that the last character of their filename will be an underscore (_) instead of the last letter (dl_ is compressed dll and ex_ is compressed exe). You can use the DOS command expand to extract those files. The alternate way of obtaining these files is installing Windows on the platforms desired and then copying them out of the windows\system32 folder.
Before going on I will warn you that neither of these methods are standard practice, but I do use the third on most of the thousands of computers I reimage. The only problem I could see in the future is if Microsoft decides to update the HALs deployed with Windows, and in this situation the files distributed in my image would be outdated. That shouldn't cause a problem though because once the computer is imaged it no longer would need the HAL and kernel included in the image, and so all I should have to do is update the image, which I do monthly anyhow for Microsoft updates.
Method 2: Overwrite HAL System Files
Using the HAL and kernel files you can easily boot the computer with the most compatible HAL / kernel and then use a batch file to overwrite the system files with the best HAL that the computer could use. The easiest way to manage this would be to use a batch file to run to update the HAL, and the next time you reboot it would be using those files instead of the more generic HAL.
In theory this could be automated in many different ways. You could have a batch or program detect the computer model and apply the correct HAL, but you would have to detect the DMI tag of the system or use some other system to do it such as WMI. I do not use this method so I have no further recommendations on this, but if you find a clever system let me know and I will post it here.
Also, if you use an imaging tool that allows you to inject files into the operating system during or after an image is deployed to a computer then you could just use that mechanism to overwrite the HAL files. I use Ghost though and that's not possible at this point. You could also image the computer and then in a preinstallation environment (such as BartPE) manually (or maybe automatically) copy the files into the system32 folder. To be especially useful this would have to be done before the OS is booted. The only problem with this system is that it may require booting into the PE twice since you would have to dismount the drive before the imaged drive refreshed with its overwritten partition tables.
The downside to this method, or at least the simplest form of it, is that if you change the HAL to a different architecture type, such as ACPI to MPS MP then the hardware detection from the mini-setup would have been wasted because it will need to redetect the devices since the plug and play model changed. And of course in the simplest form it is also a manual task.
Method 3: Reconfigure the boot.ini
The best way I could find to handle the situation of having multiple HALs is to use the boot.ini to allow selection of the HAL that you want to use. It will look much like the picture below during the start-up of the computer. This works extremely well if most of your computers use a particular HAL, but you have some machines that you can manually change the HAL on.
Luckily the boot.ini offers a method for handling this situation, although it's a misuse of the system. The boot.ini is a system file found in the root of the drive that allows you to select a predefined boot option from a selection of several options. The boot.ini provides the same menu that allows you to boot from multiple installed Windows operating systems. Each option listed can specify the booting hard-drive, partition and Windows folder to boot from, but there are also command switches that can do things such as enable or disable Dats Execution Prevention. It should be noted that the boot.ini is usually set hidden, system and read-only so you may have trouble editing it or even seeing it, and especially if you're trying to automate the edits like below. You can also use the bootcfg.exe command to edit it though, but I don't cover that.
However, what we care about is that you can specify an alternate HAL. This is really made for switching to a checked kernel for debugging purposes, but you can easily use the files I explained two topics ago along with the HAL switches to allow switching to the HAL of your choice. The two switches are /kernel and /hal to specify the kernel and HAL files. When these switches are used the files they point to are copied to overwrite the in-use HAL files on the system, namely hal.dll, ntoskrnl.exe and ntkrnlpa.exe.
Also, you cannot specify the PAE kernel file so there's a trick you must understand. The kernel file name should be no more than 6 characters in length and with the extension of course of exe. The PAE kernel file that goes along with that kernel should have the same name expect the file name should end with pa. So, if the kernel name is k.exe then the PAE kernel file should be named kpa.exe.
So, you can extract all of the kernel and HAL files you need for the HALs that you want your image to support to your Windows system32 folder. They will need to be renamed other things so as not to conflict with the in-use HAL files. And then you specify those files in your boot.ini under different startup names that reflect the HAL type. Below is a sample that shows what the boot.ini should look like, but your disk and partition numbers may vary, so really you should copy the entry currently in your boot.ini and add similar switch parameters instead of just copying what I have. Also, I do not recommend using the below structure for reasons I will explain after you look at it. It should be noted that the first OS specified will be considered the default since it's the first disk that matches the default= line. The timeout=30 means that the user will have 30 seconds to choose the HAL from the list before the default is chosen.
1. Sample rough boot.ini (watch for wordwrapping) [example]
|
[boot loader]
timeout=30
default=multi(0)disk(0)rdisk(0)partition(1)\WINDOWS
[operating systems]
multi(0)disk(0)rdisk(0)partition(1)\WINDOWS="XP Pro (ACPI Multiprocessor PC) for multi-core, hyperthreading" /noexecute=optin /fastdetect /HAL=H-AMPS.DLL /KERNEL=H-AMPS.exe
multi(0)disk(0)rdisk(0)partition(1)\WINDOWS="XP Pro (ACPI PC) for most compatability on ACPI computers" /noexecute=optin /fastdetect /HAL=H-ACPI.DLL /KERNEL=H-ACPI.exe
multi(0)disk(0)rdisk(0)partition(1)\WINDOWS="XP Pro (ACPI Uniprocessor PC) for single-core, no hyperthreading" /noexecute=optin /fastdetect /HAL=H-AUNI.DLL /KERNEL=H-AUNI.exe
multi(0)disk(0)rdisk(0)partition(1)\WINDOWS="XP Pro (MPS Multiprocessor PC) for multi-core Xeons" /noexecute=optin /fastdetect /HAL=H-MPSM.DLL /KERNEL=H-MPSM.exe
multi(0)disk(0)rdisk(0)partition(1)\WINDOWS="XP Pro (MPS Uniprocessor PC) for single-core Xeons" /noexecute=optin /fastdetect /HAL=H-MPSU.DLL /KERNEL=H-MPSU.exe
multi(0)disk(0)rdisk(0)partition(1)\WINDOWS="XP Pro (Standard PC) for old non-ACPI computers" /noexecute=optin /fastdetect /HAL=H-STD.DLL /KERNEL=H-STD.exe
|
I do not recommend that you use the above file because there is no option for the last configuration. That is, since using the /hal and /kernel switches copies and overwrites the statically named files (hal.dll, ntoskrnl.exe, ntkrnpa.exe) you do not need to always specify that kernel and HAL once you have done it already, and in fact I discourage that. In the future if Windows applies update kernel files you will want to use the updates, and those files that you specify won't be updated so it could cause problems.
2. Sample improved boot.ini (watch for wordwrapping) [example]
|
[boot loader]
timeout=0
default=multi(0)disk(0)rdisk(0)partition(1)\WINDOWS
[operating systems]
multi(0)disk(0)rdisk(0)partition(1)\WINDOWS="XP Pro (Last Configuration)" /noexecute=optin /fastdetect /HAL=hal.dll /KERNEL=ntoskrnl.exe
multi(0)disk(0)rdisk(0)partition(1)\WINDOWS="XP Pro (ACPI Multiprocessor PC) for multi-core, hyperthreading" /noexecute=optin /fastdetect /HAL=H-AMPS.DLL /KERNEL=H-AMPS.exe
multi(0)disk(0)rdisk(0)partition(1)\WINDOWS="XP Pro (ACPI Uniprocessor PC) for single-core, no hyperthreading" /noexecute=optin /fastdetect /HAL=H-AUNI.DLL /KERNEL=H-AUNI.exe
multi(0)disk(0)rdisk(0)partition(1)\WINDOWS="XP Pro (ACPI PC) for most compatability on ACPI computers" /noexecute=optin /fastdetect /HAL=H-ACPI.DLL /KERNEL=H-ACPI.exe
multi(0)disk(0)rdisk(0)partition(1)\WINDOWS="XP Pro (MPS Multiprocessor PC) for multi-core Xeons" /noexecute=optin /fastdetect /HAL=H-MPSM.DLL /KERNEL=H-MPSM.exe
multi(0)disk(0)rdisk(0)partition(1)\WINDOWS="XP Pro (MPS Uniprocessor PC) for single-core Xeons" /noexecute=optin /fastdetect /HAL=H-MPSU.DLL /KERNEL=H-MPSU.exe
multi(0)disk(0)rdisk(0)partition(1)\WINDOWS="XP Pro (Standard PC) for old non-ACPI computers" /noexecute=optin /fastdetect /HAL=H-STD.DLL /KERNEL=H-STD.exe
|
The above is improved because it allows you to select the last configuration and since it's the first option it is also the default. So, the last configuration (default) option will be whatever HAL you made the image with. The above boot.ini wouldn't show though because the timeout is set to 0, so it would never be shown to the user for reasons I will explain in a bit.
Also, there is another complication. When you reseal with SysPrep one of the last things SysPrep does is overwrite your boot.ini. This means that if you place these settings in your boot.ini and then reseal with SysPrep then all of those changes will be lost. To get around this I place the boot.ini in the sysprep folder and instead of running SysPrep when I want to reseal I run the batch file. The batch file does a lot of things, but it runs SysPrep without having it restart (just quit) and then I overwrite the boot.ini with the updated boot.ini and then have it restart the computer.
Like I mentioned before though you don't want to specify the HAL every time the computer boots but really only before the mini-setup is executed. There are numerous ways you can handle this, but the easiest way would be to have SysPrep, upon completion of the mini-setup, overwrite the boot.ini with yet another version. I recommend using the cmdlines.txt script to do this. The first #1 sample would then be set as the boot.ini after resealing with SysPrep, and then the second would be set after SysPrep completes.
This provides the benefit of not resetting the HAL every boot and it allows flexibility in the future because the last configuration specifies the default HAL names. And since #2 doesn't show since the timeout is 0 then the users aren't bothered by it after every boot, but you could use F8 on boot and show the boot selection options to change the HAL if you did change your mind on the HAL.
Using this method you could set the HAL to your most common one, and then only need to change it on the few computers that require it. I personally use, as shown in the examples, the ACPI Multiprocessor PC HAL as the default. What this means is that it supports all modern computers that have hyperthreading or multiple processors, but it also means that if the computers are older then they will hard lock on boot, which will be a dead giveaway that you selected the wrong HAL. You can easily just reboot and select the one you should have chosen the time before and it won't have hurt anything.
Anyhow, this method sounds very complicated but it's actually fairly simple once you have the concept straight.
|
